1. The Importance of Measuring Electrical Conduit Sizes
Accurate measurements of conduit size are essential for ensuring safe and efficient electrical installations. Properly sized conduits play a critical role in protecting electrical wires and cables, which helps prevent damage and ensures compliance with established electrical codes. When conduits are measured or sized incorrectly, various issues can arise, such as overheating, short circuits, and even potential fire hazards. Moreover, having precise measurements not only contributes to safety but also helps in optimizing material usage, thereby reducing unnecessary costs and waste.
This guide provides a straightforward approach to accurately measuring conduit size. It covers the essential tools needed, such as tape measures and calipers, and offers simple steps for measuring the diameter and length of conduits. By following these guidelines, you will be able to ensure the safety and efficiency of your electrical installations.
2. Basics of Conduit Sizing Explaining
Before delving into the methods of measuring conduit size, it’s essential to comprehend what conduit size entails. Conduit size refers to the internal diameter of the conduit, which dictates the maximum number of wires or cables that can be securely installed within it. Conduit sizes are generally indicated in trade sizes, which can be confusing at first glance. Common trade sizes range from 1/2 inch to 8 inches, with each increment denoting a specific internal diameter. It’s important to note that these trade sizes do not directly correspond to the actual physical measurements of the conduit. Instead, they are standardized labels that assist electricians in selecting the suitable conduit for their installation needs.
The selection of conduit size is influenced by various factors, such as the number and type of wires or cables being installed, the length of the conduit run, and the specific electrical codes and regulations that govern the installation. Consulting the National Electrical Code (NEC) or local electrical standards is essential to determine the appropriate conduit size for your particular application.
By understanding the importance of conduit size and the factors that influence its selection, you can ensure a safe and efficient electrical installation that adheres to industry standards. This knowledge helps in making informed decisions that comply with regulatory requirements, ensuring both safety and functionality in electrical projects.
3. Required Tools for Electrical Conduit Measure
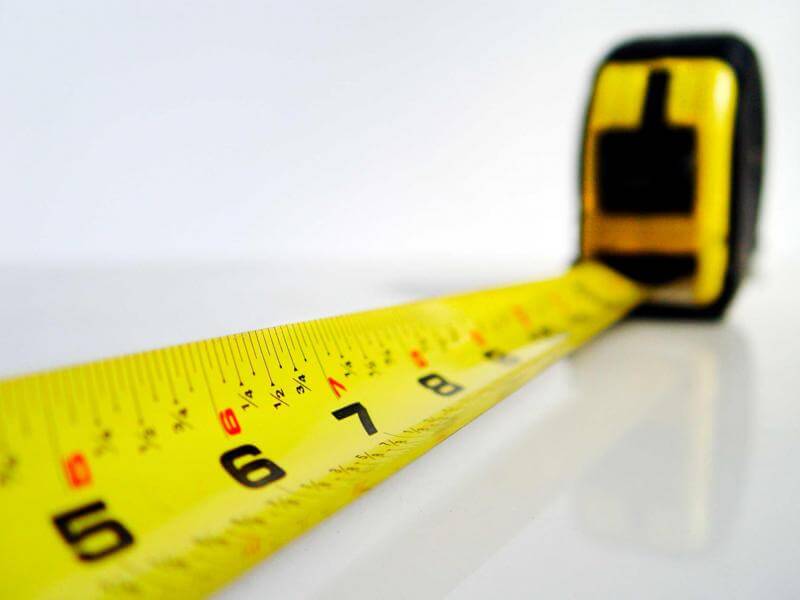
3.1 Tape Measure
Tape measure is a cornerstone tool in the arsenal of any tradesperson. Its versatility lies in its simplicity—by extending the tape and locking it into place, you can measure distances with ease. However, not all tape measures are created equal. Look for models with standout features like a sturdy blade that extends and retracts smoothly, clear and easy-to-read markings in both imperial and metric units, and a reliable locking mechanism to secure measurements in place. Additionally, consider tape measures with standout features such as magnetic tips for hands-free measurements or fractional markings for increased precision.
3.2 Caliper
When it comes to measuring conduit diameter, precision is paramount. Calipers come to the rescue with their ability to provide accurate diameter readings quickly and efficiently. And digital calipers offer the advantage of precise electronic measurements displayed on a digital screen, often with options for switching between metric and imperial units. On the other hand, manual calipers provide a tactile feel, allowing for precise adjustments and measurements by experienced hands. Whichever type you choose, ensure it’s crafted from durable materials and features a smooth sliding action for consistent and reliable measurements.
3.3 Marker and Notepad
Markers and notepads ensure that critical measurements are clearly documented for reference during installation. By keeping meticulous records of measurements, notes, and annotations, you can streamline the installation process and minimize errors, ensuring a seamless conduit system from start to finish.
3.4 Conduit Fill Chart
In addition to tape measures, calipers, markers, and notepads, another essential tool for accurate conduit measurements is the conduit fill chart. These charts provide valuable information on the maximum number and size of wires or cables that can be safely installed within a specific conduit size. By referencing the conduit fill chart, professionals can ensure compliance with electrical codes and regulations while optimizing conduit capacity and preventing overcrowding. Conduit fill charts are available in electrical code books, manufacturer specifications, and online resources, making them easily accessible for use during installations. Incorporating the conduit fill chart into the measurement process enhances precision and efficiency, resulting in successful electrical installations.
4. Steps to Measure Diameter and Length
Preparation is paramount before commencing the conduit measurement process. Ensuring that the conduit end is meticulously prepared sets the foundation for accurate measurements. It’s imperative to thoroughly clean and straighten the conduit end to mitigate any potential distortions or inaccuracies that could arise during measurement. By eliminating any debris or imperfections and ensuring the conduit is perfectly aligned, professionals can enhance the precision of their measurements, laying the groundwork for a successful installation.
4.1 Measuring Conduit Size Using a Tape Measure
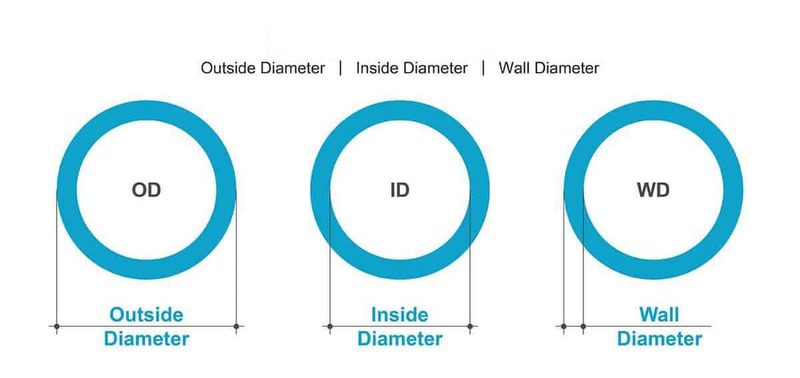
The simplest approach involves employing a tape measure to ascertain the external diameter of the conduit. This method proves handy when physical dimensions are required to find the appropriate trade size. To utilize this method effectively, wrap the tape measure around the conduit’s perimeter, ensuring a snug fit, and record the measurement. Remember to account for the conduit’s wall thickness to derive the internal diameter accurately.
When it comes to measuring conduit diameter, a caliper emerges as an indispensable precision tool. Whether determining the external or internal diameter, utilizing a caliper ensures meticulous accuracy. For external diameter measurement, the caliper is positioned perpendicular to the conduit end, with its jaws adequately open to encircle the circumference. By gently placing the caliper around the conduit and ensuring full surface contact without gaps, professionals can obtain precise readings. Carefully closing the jaws until they firmly grip the conduit enables the accurate determination of the outer diameter, as displayed on the caliper scale.
Internal diameter measurement necessitates a similar meticulous approach. By employing the internal jaws of the caliper and ensuring their parallel alignment within the conduit, professionals can proceed with confidence. Gently expanding the internal jaws until they make contact with the inner surface of the conduit allows for accurate readings. Once the jaws are securely positioned, the measurement displayed on the caliper scale offers insights into the conduit’s internal diameter.
A tape measure proves particularly useful for measuring conduit length and determining the external diameter of larger conduits. Its flexibility allows for easy wrapping around the conduit’s circumference, providing a quick and straightforward measurement. Additionally, tape measures often feature clear markings and a locking mechanism to hold the measurement in place, enhancing accuracy and efficiency during the process.
Both a tape measure and a caliper are valuable tools that can be utilized to measure conduit diameter, each offering its own set of advantages depending on the specific requirements of the task at hand. While a caliper provides precise and accurate measurements, especially for small or intricate conduits, a tape measure offers convenience and ease of use, particularly for longer lengths of conduit. Professionals may choose to use either tool based on factors such as the size and accessibility of the conduit, the level of precision required, and personal preference.
4.2 Measuring Conduit Size Using a Conduit Fill Chart
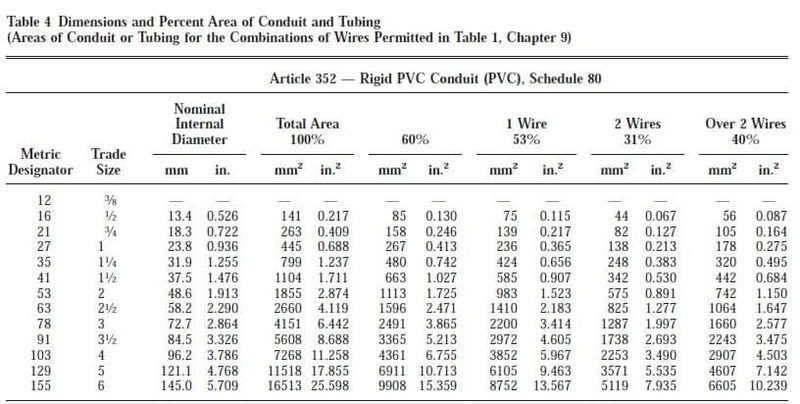
Another prevalent method entails consulting a conduit fill chart, offering insights into the maximum number and size of wires or cables permissible in a given conduit size. These charts are readily accessible online, in electrical code books, or through manufacturer specifications, facilitating informed decisions during installations.
A conduit fill chart serves as a valuable resource for accurately determining the maximum number and size of wires or cables that can be safely housed within a conduit. It factors in key variables such as conduit size, wire gauge, and wire type to calculate the conduit’s maximum fill capacity. Utilizing a conduit fill chart is indispensable for ensuring adherence to electrical codes and regulations. Here’s a simplified guide to measuring conduit size using a conduit fill chart:
Step 1: Obtain a conduit fill chart from reputable sources such as electrical code books, manufacturer specifications, or trusted online resources. Ensure the chart is current and matches the type and size of conduit being utilized.
Step 2: Identify the conduit size within the chart by locating the section that corresponds to the trade size or internal diameter of the conduit under consideration.
Step 3: Specify the wire gauge and type (e.g., THHN, THWN) intended for installation within the conduit.
Step 4: Determine the maximum fill capacity by finding the intersection of the conduit size and the selected wire gauge/type within the chart. The chart will furnish details on the maximum number of wires or cables permissible within the conduit.
4.3 Measuring Conduit Size Using a Conduit Fitting
When faced with the task of measuring the size of an installed conduit lacking documentation or labels, employing a conduit fitting for measurement can prove to be a practical solution. Here’s a straightforward approach to measuring conduit size using a conduit fitting:
1. Select a fitting: Begin by choosing a conduit fitting that aligns with the opening of the conduit you intend to measure. It should fit snugly inside the conduit, ensuring neither too loose nor too tight a fit.
2. Insert the fitting: Carefully insert the selected fitting into the conduit until it reaches a comfortable position within.
3. Check the fitting size: Once the fitting is in place, examine its size or measurement on the exterior portion. This measurement indicates the size of the conduit that the fitting is designed to fit into.
4. Identify the conduit size: Compare the size of the fitting with industry standards or consult a conduit size conversion chart to ascertain the trade size or internal diameter of the conduit.
Measuring conduit size using a conduit fitting proves particularly beneficial for existing installations, renovations, or repairs where labels or markings may be absent or faded. This method facilitates accurate size determination, enabling informed decisions regarding modifications or replacements of the conduit.
However, it’s essential to acknowledge that the effectiveness of this method hinges on the availability of a fitting that matches the conduit opening. In cases where a fitting cannot be inserted or does not fit appropriately, it is advisable to explore alternative measurement methods, such as employing a tape measure or referring to a conduit fill chart.
Measuring the conduit followed by size selection and electrical installation requires consideration of various standard sizes to match specific project requirements.
For smaller installations, conduits with diameters like 1/2 inch, 3/4 inch, 1 inch, and 1-1/4 inches are frequently utilized, while medium-sized projects might necessitate conduits of 1-1/2 inches, 2 inches, 2-1/2 inches, or 3 inches. Larger projects often employ conduits of 3-1/2 inches, 4 inches, 5 inches, 6 inches, 7 inches, or even 8 inches.
Accurately measuring the conduit diameter and consulting standard sizing charts are integral steps to ensure the correct size is selected, whether it’s a small 1/2 inch conduit or a large 8 inch conduit. Proper selection guarantees optimal system performance and safety, aligning with project specifications and industry standards.
5. Avoiding Common Errors in Conduit Measurements
Accurate conduit measurements are crucial for successful installations in construction and engineering projects. However, several common errors can lead to inaccurate measurements, compromising the integrity and safety of the system.
5.1 Measurement Process
Avoiding measurement errors requires attention to detail and proper tool usage. Double-checking measurements is essential; measure twice to ensure accuracy and compare readings with a colleague for consistency. When using calipers, ensure they are calibrated correctly, apply gentle pressure to avoid conduit deformation, and utilize external jaws for outer diameter measurements and internal jaws for inner diameter measurements. Similarly, when using tape measures, keep them straight and taut to prevent inaccurate readings caused by bending or twisting. Opt for tape measures with clear markings and a locking mechanism to secure measurements in place. These practices minimize errors and ensure precise conduit measurements.
5.2 Environmental factors
Environmental factors play a crucial role in conduit measurements, impacting their accuracy. Temperature variations can cause conduit materials to expand or contract, affecting measurements. It’s important to measure conduits at a consistent temperature, ideally within the recommended range for the material being used. Additionally, understanding the material properties is essential. Be mindful of how the material responds to environmental changes and consider using appropriate correction factors or allowances when measurements are taken under extreme conditions. By considering these environmental factors, professionals can ensure accurate conduit measurements for successful installations.

6. Conclusion
This guide emphasizes the importance of accurate conduit measurements for safe and efficient electrical installations. It covers methods for measuring conduit size, common errors to avoid, and environmental factors affecting measurement accuracy. By understanding conduit size terminology and selecting the appropriate size based on project requirements, professionals can ensure compliance with electrical codes and optimal system performance.
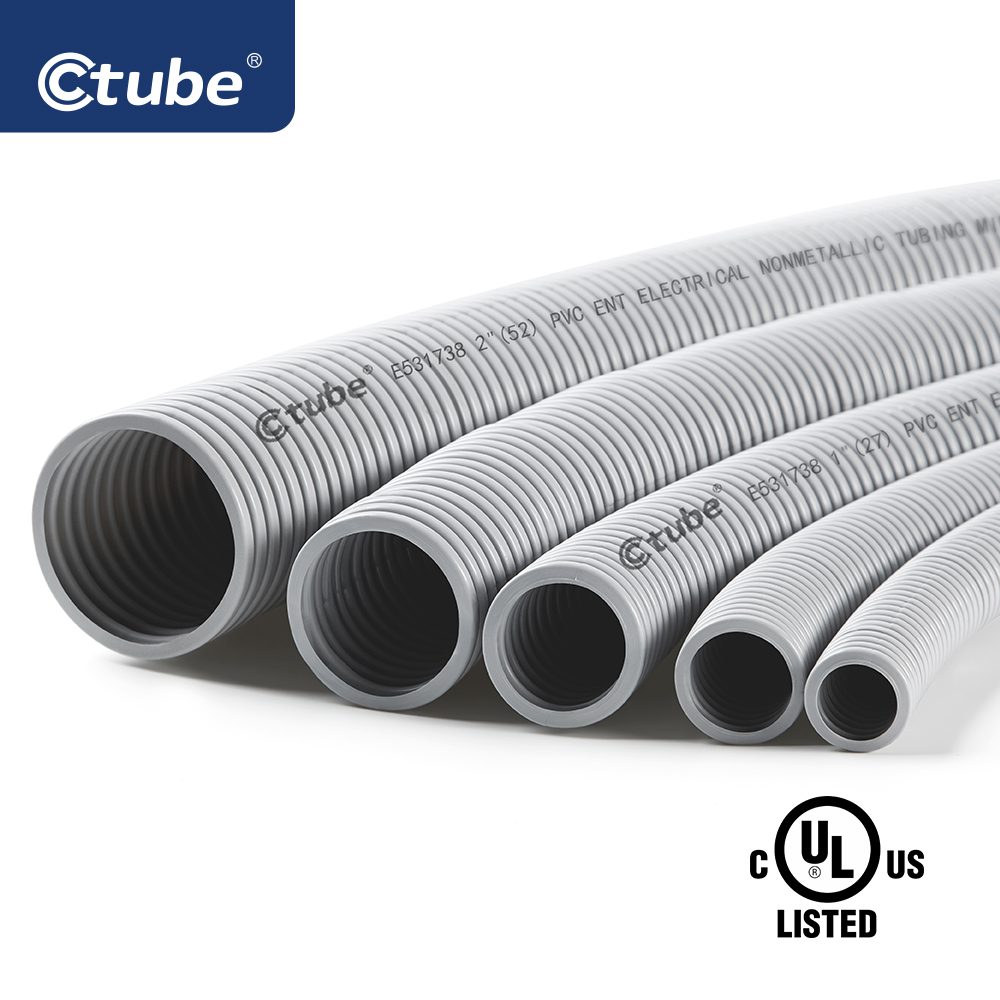
Ctube is a professional manufacturer of PVC conduits and fittings, specializing in a comprehensive range of products tailored for both small-scale and large-scale projects. Our offerings include rigid and corrugated conduits in various sizes: 1/2 inch, 3/4 inch,1 inch, 1-1/4 inch,1-1/2 inch,2-inch,3-inch,4-inch, 5-inch, 6-inch, 7-inch, 8-inch conduit.
We provide standard lengths of 10 feet and 20 feet, and we also accommodate customized sizes and lengths to meet specific project requirements. Whether your project is modest or extensive, Ctube is equipped to deliver high-quality solutions to suit your needs.
If there is anything you would like to know, feel free to contact us.