In this post we have summarized for you the 7 common steps for installing PVC conduits.
Step 1: Make a plan
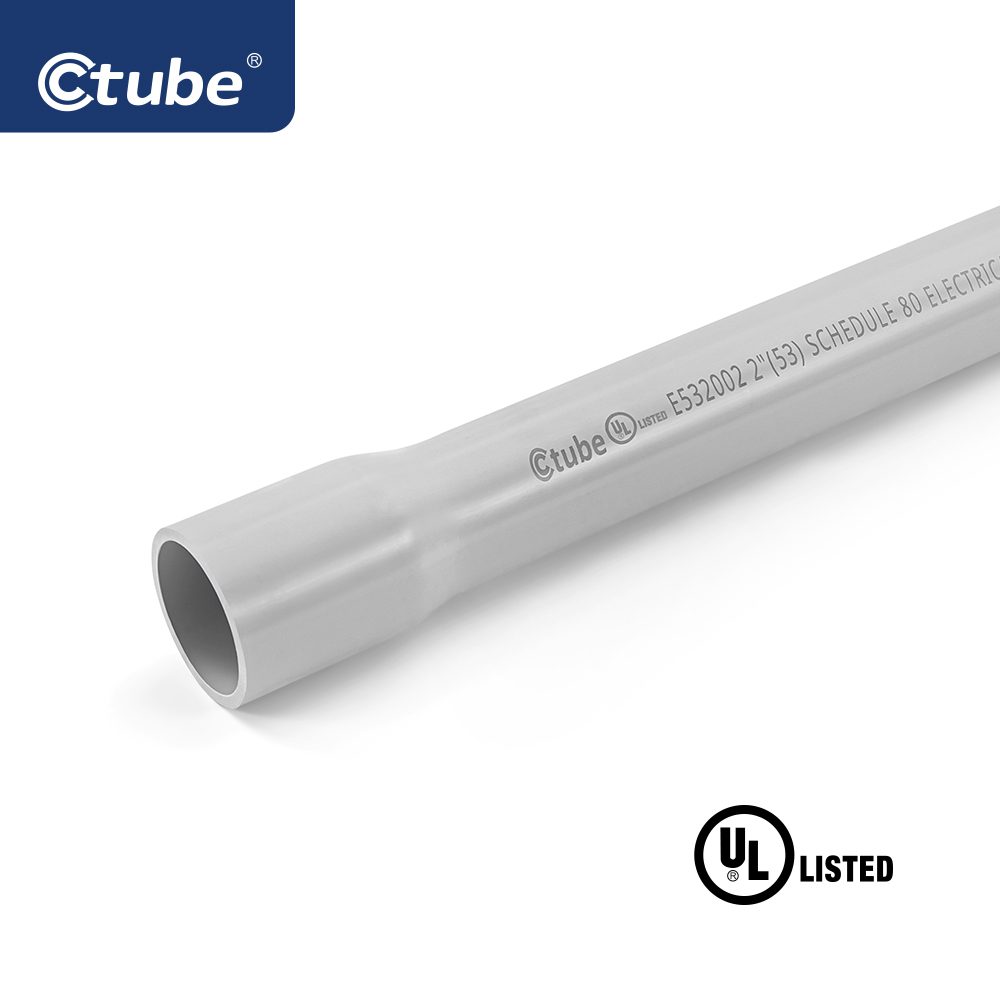
1, Choose SCH 40 or SCH 80
Schedule 40 PVC conduit has a larger inside diameter and is less expensive. It’s much easier to pull cables through it. The material on Schedule 80 is thicker yet the conduit has exact the same outside diameter as Schedule 40, so its inside size is smaller. Generally people install Schedule 80 conduit in high-traffic areas or any other areas where it could possibly get damaged. The fittings (such as junction boxes, elbow, bends and adaptors) should be the same nominal size for Schedule 40 and 80. Click here if you want to know more about Schedule 40 and Schedule 80.
2, Choose fittings
When it is necessary to change the orientation of most conduit, fittings are needed to attach the conduit to different size boxes or enclosures. There are also straps and clips to provide additional support for the conduit and to keep it secure. For example, choose an adaptable box if you want to enclose junctions, extend circuits and terminate cable length both with and without knockouts. Or perhaps, you need a solid elbow to turn the direction of the conduit run often when the conduit needs to go up or down the wall.
3, Calculate grouping factor
If a number of cables are installed together and each carries current, they will all get warmer. Cables located outside the group will be able to transfer heat outward, but will be limited in losing heat inward to the other warm cables. Other cables that are “buried” close to the center of the group may find it impossible to dissipate heat and the temperature will rise further.
Because of this, cables installed in groups with other cables (e.g., if enclosed in conduit) are allowed to carry less current than similar cables clamped to or lying on a solid surface, which can dissipate heat more easily. If surface-mounted cables are in contact with each other, the reduction in current rating is greater than if they were separated.
For example, if a particular cable has a basic current rating of 24 A and is installed in a raceway with six other circuits (note carefully that this is a circuit and not a cable) with a value of Cg of 0.57, the current rating of the cable becomes 24 × 0.57 or 13.7 A.
4, Plan the conduit run
Before you run the first stick of conduit, take a little time and lay out the job – at least in your mind. The idea may be to use as few bends and assembled supports as is practical. A little lay out time will save lots of install time. This will tend to make a more neat installation and will usually save material also.
This is one of the things you may dislike when you were an apprentice. if you have trouble visualizing the best route, take a slow patient look at the environment and then run a string down the route you think is best. this will show you obstacles and problems that you may not have noticed.
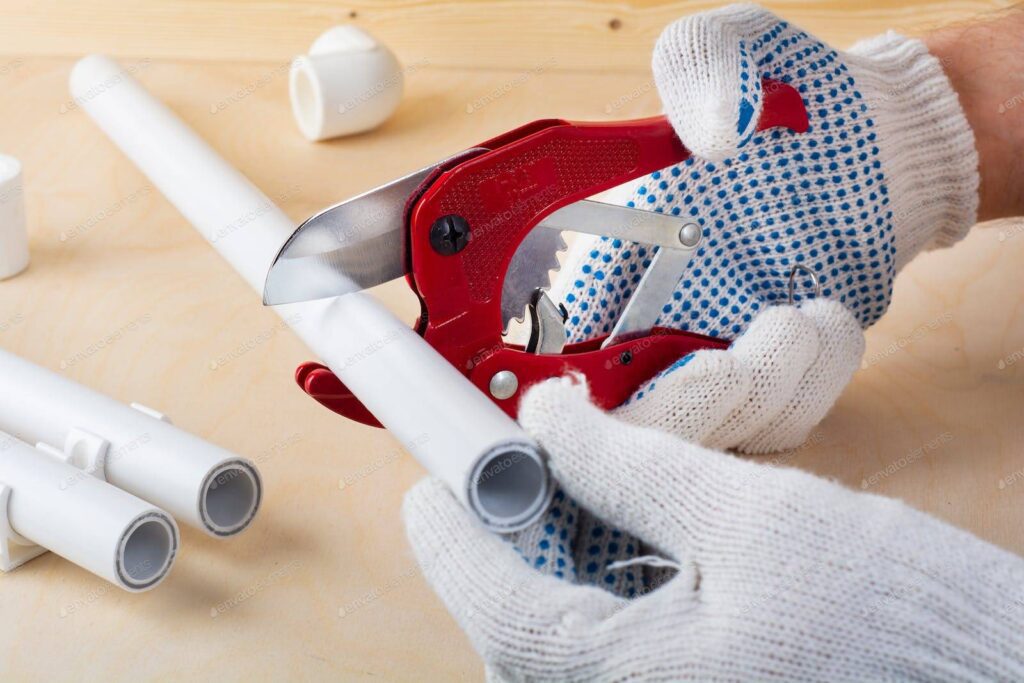
Step 2: Cutting
First, measure the conduit to the desired length and mark the area to be cut. An easy and effective way to do this is to apply painters tape or electrical tape around the circumference of the conduit so that the edges of the tape are perfectly aligned, which ensures a perfectly straight and square guide line. Next, clamp the conduit securely to a table, saw stand or suitable cutting area.
Three common tools can be used to cut conduit: a pipe cutter, an angle grinder or a hacksaw. A pipe cutter will produce the cleanest cut and is sure to be even and square. To make a cut with a pipe cutter, place it around the conduit so the blade is centered on your mark and tighten the knob until it is snug. Rotate the cutter around the conduit. With each turn, tighten the catheter a little more until the catheter is cut.
If you do have rough edges when cutting PVC conduit, don’t forget to deburr the inside of the cut edges. Burrs can damage the insulation of the wire. There are lots of fancy deburring tools available, but it’s also easy to run a hobby knife around the inside of the conduit to make it smooth.
No special tools are required to cut Ctube Rigid PVC Conduit. It can easily be cut with a hacksaw, a fine-toothed handsaw or PVC conduit cutters. For conduit with more than a 2-inch diameter, use a miter box or saw guide to ensure a square cut. Deburr the end using a knife or file.
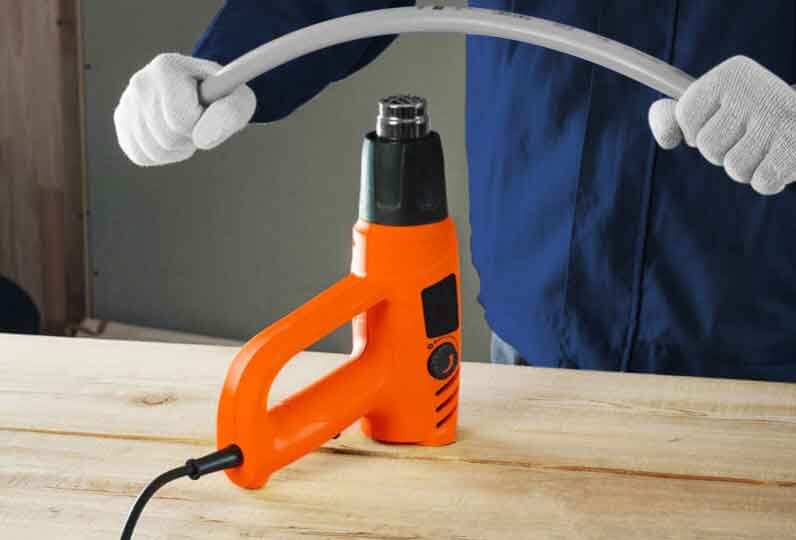
Step 3: Bending
It may be necessary to fabricate the bend in the field by heating and deforming the rigid pipe. To do this, the following guidelines should be followed.
– When heating rigid conduit, use a heat gun or other heat source that is free of fire. Do not use an open flame to heat the conduit. Rigid conduit must be heated to approximately 260˚F in order to bend without kinking.
– The heated conduit length is approximately equal to 10 times the nominal diameter of the rigid conduit.
– Once the rigid conduit is sufficiently heated, bend it to the desired angle by an additional 3 degrees. The additional angle will accommodate the “spring back” that occurs during cooling.
– Immediately after the conduit bend is complete, cool the bend with water or cold air.
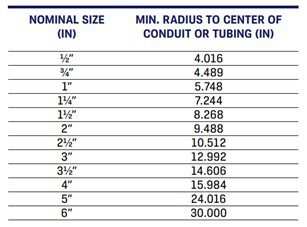
– According to the National Electrical Code (NEC), the minimum bend radius for rigid conduit is shown in the table below.
Step 4: Install the fittings
Rigid PVC conduit must be supported by straps when installed above the ground. These straps should be installed tightly while allowing for linear movement of the conduit. See the table below for recommended maximum spacing of support straps.
Store conduit and fittings at the same temperature or they may expand and contract at different rates and become incompatible.
According to the National Electrical Code, expansion joints must be used if the expected expansion due to temperature changes during and after construction exceeds 1.8 in. Ctube Electrical Solutions recommends that expansion joints be used whenever the expected temperature change is greater than 25°F.
Step 5: Solvent Welding Joints and Cementing
Use solvent-based cement and primer prior to the expiration date indicated on the container.
At ambient temperatures above 32°F, joints may be assembled without primer provided adequate penetration and softening of the pipe/fitting surface can be achieved using solvent-based cement alone. All joints should be made with and coated with a bonding agent. Allow 50% more curing time in wet weather.
Step 6: Supporting with straps
Rigid PVC conduit must be supported by straps when installed above the ground. These straps should be installed tightly while allowing for linear movement of the conduit. See the table below for recommended maximum spacing of support straps.

Step 7: Connect the conduit and the box
Apply cement to the outside surface of the conduit, let it sit for a few seconds, and then apply cement inside the connector. Carefully slide the conduit into the connector until it meets the bottom of the shoulder of the connector while twisting slightly to disperse the cement.
See if the PVC conduit is solvent welded (glued) to an adapter with an external pipe thread on one end. The threaded end of the adapter is inserted into the knockout hole and the lock nut is screwed on inside the box.
If the box is a wet-site rated box with built-in threaded fittings, the adapter screws directly into the box. Typically, the adapter is attached to the box before it is glued to the conduit. In the case of PVC boxes with integrated fittings, the conduit is glued directly to the box. Flexible PVC conduits require special compression fittings with external threads on one end.
Note that PVC conduit (gray in color) contains additives that prevent UV degradation and also help reduce burning and smoke in the event of a fire. Painting the conduit (after inspection) can further help prevent UV degradation. Plain (white) PVC conduit should not be used for electrical wiring because it does not contain the necessary additives, and conduit should not be used for potable water.
Note also that PVC conduit is non-conductive and should not be used as a grounding/earthing conductor. If the application requires grounding/earthing, a separate equipment grounding/earthing conductor should be installed.